Showing posts with label recipe. Show all posts

Friday, May 20, 2011

What's for dinner tonight.....

Continuing the theme of leftovers this week - poor family, they have been fed a smorgasbord of leftovers this week - old grotty ham from the fridge in quiches, soft squidgy tomatoes in yet more quiches, frozen chilli con carne leftovers in pasties, and limp hot dogs and out of date ready roll flaky pastry for sausage rolls.


But tonight I am going one better, the whole dinner is made up of random leftovers I found when making space in the freezer in the barn, so here goes:

Take a couple of handfulls of frozen cherry tomatoes
About 1 large chopped leek
A bowlful of frozen french beans
and 8 random chestnuts


Unfortunately I did not peel the chestnuts before freezing them, therefore first things first, boil the chestnuts for a couple of minutes then while still hot, peel the bitter skin off, although this does scald your fingers, it is much easier to do while the chestnuts are hot.  Once peeled, roughly chop the chestnuts.

In a large pan, pour in a tablespoon of olive oil, then the chopped chestnuts, a couple of grinds of black peppercorns, and 2 cloves of garlic just smashed up with the blade of your knife.  Fry for a couple of minutes, then add a teaspoon of salt, and a teaspoon of paprika, and a teaspoon of dried chillies.

Add the leek to the pan (no need to defrost), fry until the leek is soft, then add the cherry tomatoes, and continue frying until the tomatoes are soft too.  


Add a litre of chicken stock, the beans and leave to cook for about 8 minutes, until the beans are cooked through.

To finish, a big pinch of dried oregano, stir through and serve as a side to whatever meat you have knocking around, we had ours alongside some beef steaks I bought reduced a while ago.  Mop up the juices with a couple of doorstep wedges of homemade multi grain bread.


I find my family can manage to stomach leftovers if served alongside some good thick portions of quality meat, pork chops, roast chicken legs and beef steaks.

Wednesday, April 20, 2011

French onion soup with a Tuscan twist

OK - so the photo does not do it justice. In fact it looks pretty awful. Good job it tastes totally yummy.

I call it a French onion soup with a Tuscan twist - because it has cured ham in it - and apparently that is a Tuscan touch to a traditional French recipe.

So here is the recipe and my economical cooking method.


French Onion Soup with a Tuscan twist

4 large white or yellow onions
1 red onion
2 rashers of pancetta cut into lardons
2 litres of chicken stock
1 large baking potato
3 tablespoons of dried parsley

Use a heavy bottomed, cast iron pan with a lid if you have one.

Chop the onions thinly, then fry in a tablespoon of olive oil, with some generous twists of pepper and the lardons.

This is not a lot of oil, but the fat from the lardons will help the frying, when it starts to dry out in the saucepan, add a bit of water rather than any more oil, cover and leave the onions to sweat for a couple of  minutes until they are starting to become translucent and soft.

Add the stock and bring to the boil - taste and season if you need to, but the pancetta is quite salty so go carefully if adding more salt.

Cut the potato into small cubes, less than a centimetre, without peeling, then add to the soup and just bring it briefly back to the boil.

Then turn off the heat and cover the saucepan with its lid - then cover again with a layer of aluminium paper.

Leave to stew in its own heat while you go off and do something more interesting - I went for a 5km walk with the dog and came back starving.

To serve, just heat up - the small cubes of potato will have cooked in the residual heat in the pan and their starchiness will thicken the soup, throw in the parsley, stir through and munch a bowlful with some home baked bread.
Posted by Picasa

Monday, March 28, 2011

Monday night is 'Addicted to Foccacia' night


My mummy is very good to me, and believe me I do appreciate it.

My latest demand was for a couple of editions of a baking magazine being advertised on the TV with some freebie silicone moulds. 

When they arrived I managed to restrain myself from making endless cupcakes but found this foccacia recipe inside. And now I am addicted. This has to be the easiest bread to make but so light and fluffy and utterly scrummy. 


Foccacia Bread

  • 450g strong white flour 
  • 2tsp fast acting yeast - or as I use dried yeast, one heaped teaspoon of dried yeast reconstituted with 250ml of warm water and half a teaspoon of sugar 
  • 2 teaspoons sea salt 
  • 1 tablespoon of dried herb of your choice - so far I have made Rosemary, Thyme and Tarragon breads 
  • 4 tablespoons of olive oil - or if you are watching your waistline, just use one tablespoon of olive oil and a little more warm water 


Sift the flour into a large bowl, then into a well in the centre add your yeast. If you are using fast acting yeast from a sachet you will need to add 250ml of warm water
Add the oil, herbs and 1 teaspoon of the salt, then start mixing together with your fingers or a wooden spoon, you might need to add a drop more warm water to create a smooth pliable dough. 

Place on a floured surface and knead well for about 10 minutes. I find this bit very addictive and have to time myself so that I don't spend too long kneading it. 

With a pastry brush or your fingers smear a bit of oil into the bowl and over a piece of cling film, pop the dough back into the bowl and cover with the cling film then leave to rise for about an hour or until it has doubled in size. 

Once fully risen, pop it out of the bowl and knock back a couple of times to punch the air out, then either separate into however many breads you want or as in the photo above one big loaf (for tearing into chunky bits and dipping into spicy salsa chicken). 

Make sure the breads are about 1cm thick, either roll or push flat with the palm of your hand, then place onto an oiled baking sheet or some parchment paper, recover with the cling film and leave to rise again for about 20 mins. 

Preheat the oven to 220°c, gas 7. - Or in my case, stoke the Rayburn with a bit of coal and cover the oven door with a damp towel - it really brings the oven temperature up quickly - quirky but it works. 

If you have some fresh herbs, poke those into the dough before baking and sprinklyewith the rest of the sea salt -  if you are not watching your weight, drizzle the breads with a bit of olive oil, but I have not been doing this as I don't think they need it. 

Bake for 15 to 20 minutes until just golden on top, leave to cool and then stuff yourself silly. 

Just adapt the herbs you use for your recipe.  For curry I have done rosemary flavour  individual loaves,  for with Sunday lunch we had thyme flavour, and for tonight's spicy chicken salsa we had the bread in the photo above, a tarragon loaf.

Sunday, February 6, 2011

February C of cooking - Spicy Butter Bean Curry with Perch filets

Here is the recipe to go with the macro butter bean shots.

Spicy Butter Bean Curry

I used dried butter beans, soaked overnight in cold water, then cooked for an hour; but you can use tinned beans which are obviously ready to use.

This is another one pot recipe so grab a large heavy bottomed pan with a lid.

serves 4

2 cups of rehydrated and cooked dried beans or large tin (400g) of butter beans
2 cups of frozen green beans
1 large onion sliced
1 small red chili chopped finely
1 tablespoon mustard seeds
1 tablespoon tumeric
1 tablespoon ground cumin
1 tablespoon ground coriander
15 curry leaves or if you don't have curry leaves you could use 3 tablespoons of curry powder
2 tablespoons of a garam masala spice mix
1 tablespoon of coconut oil if you have it
2 tablespoon of vegetable oil not olive
1 small carton of coconut milk
1 cup of water
Salt and pepper to season

Fry the mustard seeds until they start to pop in the veg oil, then add the onions and chili and leave to saute over a gentle heat until the onions are transparent and soft. Then increased the heat and fry the chili.

Because I am lazy and never fancy doing loads of washing up, if I can get away with it I will just add the spices to the pan rather than creating a separate spice mix in another bowl.


Stir in the coconut oil if you have it - this is just for authenticity and is not required so if you don't have it don't stress, add the spices to the pan and fry off gently for a few minutes.
Then add the cup of water and the beans, cover and leave to simmer for 15 minutes.


Stir in the coconut milk, bring to the boil, season, then reduce to a simmer for another 15 minutes.  I know this means that the beans are a bit overcooked but in my mind for a curry the veg should be soft and not al dente as you might expect when serving as side dishes.

To continue with the 'new' theme - as well as cooking this recipe for the first time, we are eating it alongside a 'new' fish for us.  
Perch is often on sale here on the poissonerie, but it is not a fish we have ever tried before, so I grabbed a couple of large filets, and just used one to serve 3 people.

Cut into 3 generous filets, I seasoned them in a large oven dish, added a splash of water covered with tin foil and left to cook for 20 minutes.


I decided against adding the fish to the curry because I wanted to sample the flavour of the curry without being overwhelmed by the fish, and for the same reason I cooked the fish separately.  It has a good firm meaty texture, but is not at all 'fishy' in smell or flavour.  Very good in fact so that can go on the shopping list for the future.

Sunday, January 30, 2011

January's C of Cooking - Rabbit Cobbler - A Rayburn Recipe

This is a slow cook recipe designed for the Rayburn or other wood stove.  For electric equivalent either 120°C for the same number of hours or 180°C for a couple of hours.

Also designed to be cooked entirely in one pot - for those lazy Sunday afternoons.


First take your rabbit - here is one I prepared last year.
Cut him into eight sections, 2 back legs, 2 front legs with rib cage, and the saddle and back into two then halved down the spine.

Brown the pieces in a large oven proof dish - I love cast iron pans because they radiate heat so well for the Rayburn -  TOP TIP - to store your cast iron pans without them rusting, after using and washing, once dry, brush the insides using a pastry brush with a bit of vegetable oil before storing, to reuse, just wipe the insides with a bit of kitchen paper and they are ready to use.


Once the rabbit is browned add a splash more olive oil and 3 peeled and quartered onions and a generous grinding of pepper.  Leave to sauté for a few minutes until the onions start to soften.
 
This recipe calls for stock, but because this is a one pot recipe and it will be cooking for quite a while, there is no need to create or add a separate stock, just make it in the pot you are using, and it will be full of meaty flavour.

To the rabbit and onions add a couple of litres of hot water, then add in some carrots chopped into large pieces, 2 bay leaves and a couple of stalks of celery.  In France it is practically impossible to find celery in the shops in winter, seasonality is very important here, and nobody in my family including me actually likes celery to eat.  It does however seem to be an integral flavour in stock, so I always grow a small patch then chop it and freeze it to use during the year.  (Alongside lots of other frozen herbs).


Season the stock well then bring to the boil.  Add mushrooms - either frozen, or tinned, fresh or rehydrated dried mushrooms, whatever you have to hand.  You will need a couple of handfuls.

Once the stock is boiling, cover the pan and shove it into the centre of the oven for as long as it takes to cook the rabbit so the meat is falling loosely off the bones - in my old Rayburn at approximately 250°F / 120°C that can be up to 4 hours on wood alone.

To serve the rabbit add copious amounts of either dried or frozen thyme.  Season to taste.  Once the liquid is to your taste, throw over the cobbler.


Cobbler is a thick pastry type top that is very easy to make and is a real alternative to a pie pastry, I usually serve it in place of potatoes as it is quite stodgy.

Sift 100g white flour, 100g of wholewheat flour, 1 teaspoon of baking powder and a pinch of salt.  Using your finger tips to rub together to a bread crumb consistency add two heaped tablespoons of room temperature butter and a tablespoon of herb of your choice - here I am using parsley.

To bind together, slowly pour in about 100ml of milk, maybe a tablespoon more, just enough so that the pastry does not crumble too much.  Don't make it too wet as it will need to absorb liquid from the stew, both to cook the cobbler and to thicken the stew.

Make a soft dough, then with floured hands roughly pat it flat and into the shape of your pan, lay over the stew leaving a small air gap around the edges.  Leave to cook for a further 40 minutes (probably less in the electric oven at 180° C°).

Serve in big spoonfuls into bowls for a tasty Sunday dish that takes 20 minutes to prepare, about 5 hours to cook and is totally yummy bunny.

Wednesday, December 1, 2010

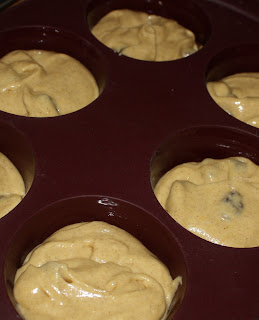
Pumpkin Muffins


With the snow still falling and the broken freezer still half full, time for yet more cooking and baking.

Today : Pumpkin Muffins

120g butter at room temperature
150g brown sugar
4 tablespoons molasses or golden syrup
1 beaten egg at room temperature
225g cooked pumpkin puree
225g white flour
1/4 teaspoon salt
1 teaspoon bicarbonate of soda
1 teaspoon of cinnamon
1 teaspoon of grated nutmeg (optional)
50g raisins or currants

Preheat oven to 200°C - this mix will make approximately 14 muffins so prepare the requisite number of paper cases.


  • Cream the butter and sugar together untilo soft, add the sugar and the molasses/syrup and beat with an electric whisk until light and fluffy.
  • Add the egg and the pumpkin, stir well until blended.
  • Sift over the flour, salt, bicarb, cinnamon and nutmeg, fold just enough to blend together, do not overmix.
  • Fold in the dried fruits.
  • Spoon the mixture into the cases, filling them 3/4 full.
  • Bake for 12 to 15 minutes or until the tops spring back when touched lightly.


I am using my silicone mould for the first time. This was given to me by a friend who had tried it and was not impressed, I had obviously then shoved it into the back of the cupboard and now it is going up against paper cups in direct competition.

With the left overs of pumpkin puree and last night's courgette and tomato spicy meatball sauce, I am combining to make a Thai red curry soup for Brendan tomorrow for his breakfast.  Yes - breakfast, as he is going to be up at 4am to drive the snow plough for the first time around the commune, so by the time he gets home he thinks he is going to want something more substantial than a cup of coffee and a slice of cake like normal.


Posted by Picasa

Thursday, November 25, 2010

101 ways with filo pastry

Lovely lamb fillet courtesy of our lamb Ernie last year

....not really 101 ways, but my favourite, samosas.

Filo pastry is very hard to find in our neck of the woods, in fact it is as rare as rocking horse doings, but yet again my lovely north African supermarket came to the rescue, and nestled in the back of their fridge there was a sole pack of filo.

So I grabbed it and ran from the shop, throwing a few coins at the poor bemused girl at the till on my way past, cackling and caressing the packet all the way. Err - may be a while before I am welcome there again.


Over the last few days as I have been cooking for an army again, I have been using the leftovers in samosa fillings, experimenting with various spice combinations to get a lovely curry flavour.

Here are a couple of my favourites:

Traditional Indian Lamb Samosa filling

500g of left over meat or fresh minced lamb
1 onion
2 cloves of garlic crushed
1teaspon curry powder
½ teaspon chilli powder
1 teasmon ground tumeric
½ teaspon gorund roasted cumin seeds
1 fresh chilli finaly diced
1 teaspoon fresh coriander or ½ teapsoon ground coriander
1 cm of fresh grated ginger
salt and ground pepper to taste
juice of half a lemon

Combine all the spices with the juice of the lemon to make a paste, fry the onion and garlic, add the meat and fry until cooked through if using raw meat, then stir through the paste.

Place a tablespoon of mixture onto the edge of your filo pastry strip and fold as per the photos above, always folding the long edge at right angles.

In an attempt to be slightly healthier, I don't fry my samosas but oven bake them, they only need 5 minutes each side at 220°C, but do remember to turn them otherwise you'll have one crisp side and one soggy side.

Alternative Veggie Samosa filling 


½ cup cooked green beans or peas or carrots or any other left over cooked veg
4 medium cooked potatoes
1 fresh green chilli
1 teaspoon ground ginger
1 teaspoon cumin
½ teaspoon garam masala
½ teaspoon ground coriander
handful of raisins
handful of sliced almonds


and if you have it
½ teaspoon dried mango powder


In a bowl, combine all the ingredients together then fold as above, and oven bake as above.


None of the snow from yesterday has stuck, but it has just started snowing again, looks like a peaceful afternoon of cross stitch for me, and hopefully I can get my second knitted hat finished today.


Posted by Picasa

Thursday, October 21, 2010

How to make stock..


It is almost that time of year again when I have to start considering the despatch of our birds. This year we have a goose, four ducks and sixteen chickens as well as six rabbits to add to our freezer.

But first I have to somehow make room for them in my two crammed to the gunnels chest freezers. One still contains large amounts of Ernie the lamb, and in the bottom of the other I still have some bits of bacon I made from our pigs in 2007.

Whilst delving around looking for tomorrow's dinner party main (rabbit) I found a couple of bags that I had conveniently labelled 'duck carcasses for stock'.

So in preparation for the dinner party rabbit dish I am making the stock for it today.

Stock is really easy to make but very rewarding taste wise. You can make either brown stock from roasted bones - particularly good with big meaty marrow bones like beef, or a white stock from uncooked bones.

These are uncooked bones leftover from last winter's duck cull, where the breasts and legs have been removed but there are still meaty tendrils on the ribs and the wing nubs.

The basic ingredients for a good flavoursome stock are carrots, onions, bay leaves, garlic cloves, salt and pepper.

This basic stock is ideal in pies, stew, casseroles and gravy.

I make flavoured stocks if I intend them for a specific dish, so if making a curry I will make a stronger garlic stock, or a thyme based stock or marjoram. Just add big bunches of the fresh herbs or a tablespoon of dried to the stock water.

Amounts are always rough because I find it depends on the bones, but at least 2 large carrots peeled and cut into batons, 2 medium onions quartered, 3 bay leaves and 5 cloves of garlic. A generous teaspoon of salt and some black pepper ground in plus 5 or 6 peppercorns in the stock water. Add the bones and leave to simmer for hours on gentle heat.

To preserve, strain the liquid and while it is still very hot, decant into a clean and dry but empty wine bottle, cork and leave in the fridge where it will keep for a couple of weeks. Once opened it does go off quite quickly but a wine bottle (70 cl) is about the right amount of stock for most recipes.
Posted by Picasa

Tuesday, October 19, 2010

A plague of Mondays and a walnut cake


That is what they feel like, all those dreary little jobs to do on a Monday, letters to write, offices to call, grrrrrr - at least there was some respite to be had playing with my new chickens.

Three Orpingtons joined my flock on Sunday and very pretty they are too, they just need to settle in with my current girls and their man. To introduce new chickens which I tend to do every year because we always have a few that are destined to be for the freezer, I have a so far reliable method.

The first afternoon the new girls stay in the large dog cage where they can be seen by all the other birds, they get grain scattered in and around them so that they all have to eat together. They sleep separated for the first night. The second day they spend half the day still in the cage, but learning that the sound of grain rattling in a tin can brings them food - as well as a greedy audience to dine with them. They sleep separated for the second night. The third day the new girls are fed first so that they are not starving hungry and likely to fight for food, then the remainder of the birds are released to a mountain of grain so as to cut down on any fighting for food. And that's it....(touch wood) it has not failed me yet.

Now that Monday and the deluge of horrid little jobs is over, I can relax and get back to baking and sewing and other fun things.

Started today by edging my aida ready to start my cross stitch project for the winter, I usually edge with masking tape but have a cronic lack of it at the moment and it is just not on the shopping list so good old sticky tape (remember how hard Blue Peter presenters would have to work not to say the dreaded Sellotpe word?) will do.

And today's comfort food is Maple Walnut Tart.

pastry:     70g plain flour
70g wholewheat flour
pinch salt
100g cold butter cubed
1 egg yolk
2-3 tablespoons iced water to bind together

Rub the flour and butter together to form breadcrumbs then cut in the salt and the egg yolk, bind together with the water until you have a solid dough ball, then refridgerate for at least 20 minutes.

Preheat oven to 220°C.

Roll out the dough on a lightly floured surface, work it as little as possible so that it stays very short, mine cracked apart when rolling and I just put in the dish and pressed the edges together so as not to warm it up too much. Prick the base all over and bake blind for 10 minutes, finish with a couple of minutes without the baking paper and baking beans to crisp the bottom up.

filling:     3 eggs
pinch salt
55g caster sugar
55g melted butter
250ml maple syrup or just use golden
115g chopped walnuts

Whisk together the eggs, salt and sugar, stir in the butter and the syrup.

Pour the filling into the case and sprinkle over the nuts. Bake on a tray for about 35 minutes until the filling has set.

I admit freely this cake is moreish - it is not the healthiest breakfast to have but the sugar hit with coffee is just the best start to a cold winter's morning I can think of. Probably a good job a good friend did not manage to convince to join an on line slimming club - I think that alone would be all my points for the day used up in one meal.

Posted by Picasa

Sunday, October 17, 2010

What to do with 5 kilos of walnuts?

Walnut bread for starters.

French Pain Aux Noix

50g butter
350g wholemeal flour
115g plain flour
1 tablespoon light brown sugar
1 1/2 teaspoons salt
15ml dried active yeast
275 lukewarm milk
175g walnut pieces


Preheat oven to 220°C.

Add the sugar to the dried yeast and pour over some of the warmed milk, use when about 2 cm of foam has formed.

Start the butter melting in a pan.

Mix the flours and salt into a bowl and make a well.

Pour in the yeast and the remainder of the milk, pour in the butter through a sieve then mix together by hand to form a moist dough.


Knead for a few minutes then leave to rise for an hour in a warm place in a covered oiled bowl.

Once risen gently knock back onto a floured surface, then press the dough out flat with the heel of your hand. Sprinkle over the chopped walnuts and press lightly into the dough, then roll up. Leave to rise again for another 30 minutes.


The traditional way to bake this bread is to make two separate balls, but I perfer it as one longer loaf. When it has the shape you want leave it to rise for another 45 minutes.

Place the dough roll onto a baking tray and bake in the centre of the oven for 35 minutes. If making ball loaves slash the tops, but when I make the longer roll I just leave the wrapped over edge on the top.

Leave to cool on a wire rack.

This bread is particularly wonderful with cheese -walnuts and a soft St Nectaire cheese are a match made in heaven - particularly when eaten on the sofa in front of Star Trek Generations.


Posted by Picasa

Thursday, October 7, 2010

Did you know that the Dutch are renowed for their cocoa powder?

Well neither did I, but I read it in a cookery book so it must be true.

Actually being a bit of a nerd (for those who may not have guessed) I went and googled it.  Apparently there are two different types of cocoa powder for those not initiated into the mysteries of high level baking.

There is normal cocoa powder and Dutch processed cocoa powder.  The latter being preferred for delicious desserts due to its lighter and chocolatey flavour, and its suitability for use in recipes calling for baking powder.

That may be something I have to add to my list of goodies to try courtesy of some Dutch friends.

In the meantime with my inferior English cocoa powder - oh no hang on - that is not very politically correct of me - my differently abled cocoa powder - I am going to attemp this recipe from my new second-hand cook book.


'In 3 easy steps' by Conrad Gallagher, cost me a pound in the Oxfam book shop and I have been inspired to try quite a few recipes out, albeit that the title of the books is a bit of a misnomer.  Now even in my novice cuisine naive way I know that nothing that you cook that requires a recipe in a posh book with beautiful photos is going to be acheived in 3 steps.  My day to day cooking is done in 2 normally - 1.  peel things, 2.  throw them all in a pan together and hope for the best.

But this is quite a simple book for posh nosh.

So here is his Dutch Chocolate Mini Cakes recipe and my larder substitutions in blue.


100g unsalted butter
175g dark chocolate
110g caster sugar
2 large eggs
1 vanilla pod seeds scraped out and kept    1 teaspoon vanilla extract
40g flour
1 tablespoon Dutch cocoa                          1 tablespoon supermarket own brand cocoa
1/2 teaspoon baking powder
110g chopped macadamia nuts                   100g chopped flaked almonds


Now I could copy word for word his 3 stages but in reality they are so crammed with information that it is easier to follow if I break down each stage further.


Preheat oven to 180°C

Cut the butter into small cubes and put it with the dark chocolate broken into small pieces in an oven proof dish and leave it in the oven while it is preheating to melt.  (that is my adaptation of the butter and chocolate melting thing as it is a much easier and economical way of doing it)

Stir in the sugar while the mixture is hot enough to melt the sugar so that the mixture is smooth.

Leave it to one side to cool, then beat in the eggs and the vanilla seeds or extract. It has to cool or the eggs will scramble.

Sift all the dry ingredients together into a large bowl, then stir in the chocolate mixture and then the nuts.

Pour into individual paper cases or cake moulds and bake for 10 minutes.

Easy peasy lemon squeezy.


I have to say that the lush food photography really is food porn for the eyes.


The photographer is Gus Filgate - google his name and you get a whole host of lush photos of food guaranteed to get your mouth watering.

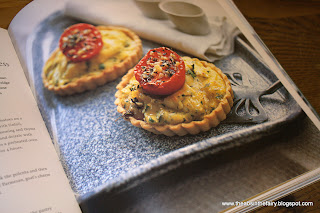
This is going to be my next foray into 3 easy steps cooking - Goats cheese and Polenta tartlets.


have to go now, drooling all over the keyboard.......


Tuesday, October 5, 2010

'Shrooms - Foraged Cep Risotto

I love a good 'shroom, I am just very wary of picking anything that I can't identify.

Luckily one of the tastiest 'shrooms is one of the easiest to be sure of, the Cep, (thank you Wiki once again : http://en.wikipedia.org/wiki/Boletus_edulis).


Looks like Mushroom Risotto for dinner tonight - all except for Thea who is convinced that I am going to poison her so just plain pizza for her.

Foraged Cep Risotto


1 cup of arborio rice per person (amounts below are for 2 people)
1 large cep cleaned and sliced thinly
1 large onion thinly sliced
1 small glass of white wine
1.5 litres of boiling chicken stock
salt and pepper to season
1 tablespoon of olive oil or butter


Bring the stock to the boil in a separate pan, meantime in a large shallow pan fry the onion gently in the olive oil (or butter if you prefer).

When the onion is translucent, add the rice and fry gently until every grain has a coating of oil and has started to become opaque, then add the glass of white wine and bring to the boil, when this has reduced start adding the stock a ladle full at a time.

Stir through the rice until it has been absorbed then add another ladle, after about 10 minutes and when the rice liquor is thick and creamy with the starch from the rice, add the sliced cep, leave to cook for a further 20 minutes stirring pretty much constantly to prevent the rice sticking to the base of the pan, until most of the liquid has been absorbed.

Season and serve.

You can grate over a bit of parmesan to finish - but I don't have any and I don't like it anyway so I don't.


Best not to eat these though, beautiful though they are....


Here we go, dinner cooked on the pot belly stove in the living room, making the most of only lighting one fire that can provide heat and a stove.


Thursday, September 30, 2010

Top up Thursday

For alliteration purposes I am sure that this should have been Tuesday, but never mind.

You know those days when you put your hand on something and it is empty, like the salt cellar or the milk jug, well I am having one of those days, so far the counter top wash bottle has been empty, the coffee pot, my bottle of facial cleanser, the milk carton and the bleach spray for the bathroom - sensing the theme here - so I am having a top up day.

With everything now brimming over with its intended contents I can get on with more fun things, like finishing my rosehip tea.

Having dried out the rose hips overnight on a tray in the warming oven, I gave them a rough chopping with one of those double handled herb chopping knives - I have only used this a couple of times so I do have to justify its position on the knife rack!

Then seive them through a fine mesh seive, like sifting flour, you will be surprised at the amount of fibres that come off the rosehips - these can be irritating so best to deal with them now.


I found another of my bargain finds lying around in the barn, a stoppered glass jar with a rubber seal, and I have to say the rosehips are a pretty addition to my sideboard too.

They smell utterly divine - shame I can't photograph that for you.

Monday, September 27, 2010

The last green tomato recipe I promise

Green Tomato and Ham Soup

Fry in a little butter:

200g ham or 150g bacon
1 small onion diced
2 cloves of garlic

When the onion is golden and soft add:

1 litre of chicken stock
8 medium green tomatoes
2 medium red tomatoes
1 green bell pepper
salt and pepper to season

Boil it all together for at least 30 minutes, then using a stick blender whizz it up to create a thick green gloopy soup. To finish and just before serving, stir in a dash of tabasco sauce.


It is turning cold here, another ground frost last night, and just a few cabbages left in the garden now, oh and some potatoes to dig up, and some more beetroot - er I think that's it now.

It is heading fast and furiously into fire lighting in the studio and handing out in there time. Hurrah. With the recent amount of time spent gardening and dealing with the harvests I have not had much chance to get any sewing done so looking forward to getting stuck in to some of my outstanding projects.


Yesterday was a lazy day, the puppy went home leaving behind some bereft kittens and a moping Border Collie, we played a game of Monopoly (which Thea won AGAIN) and then a bit of knitting in front of the TV, once again trying to finish off some projects neglected over the summer when you don't much feel like knitting winter woolie hats!

Now it is Monday morning, I have spent it so far dealing with outstanding emails and correspondence from the weekend, a quick stroll with the dog in a minute and then when I get back from work I am shutting myself away with my fire in the studio.
Posted by Picasa