Showing posts with label harvest. Show all posts

Friday, July 15, 2011

Dry spell + Downpour = GLUT

Ooops


So what is a person to do with 15 kilos of courgette and another 20 of deformed patty pan squashes?

Light the Rayburn and get cooking......


... from left to right ratatouille, patty pan squash Thai soup and squash and veg soup.

 Winter larder is stocked up, some soups in Kilner jars, some boiled down to thicken as sauce bases for Thai curries, and several tubs of ratatouille for the freezer.
As well as the pickled walnuts now in jars ready for Christmas.

Now the sun is out the greenhouse is starting to produce ripened fruits too, today's harvest is a one person serving of green pepper, aubergine and assorted varieties of tomatoes.


They are going to be my dinner tonight, chopped and fried with a bit of garlic to go in my risotto.


Monday, June 27, 2011

Today's harvest

Poor Brendan, as the weather hots up and food finally starts to appear in the garden I feel another supermarket embargo coming on.
Today's harvest gives me: 5 quail eggs, 4 chicken eggs, some raspberries, 1 yellow tomato, a clump of swiss chard, some patty pan squashes and some courgettes - of course!

Tonight's menu based on my harvest and store room staples:

Courgette and tomato tart (on pre rolled flaky pastry) - thinly sliced peeled courgette and ripe red tomatoes arranged on pastry then seasoned with salt and pepper and a drizzle of sun dried tomato flavoured olive oil
Crab and grated carrot salad in homemade mayonnaise with garlic and ginger
Tuna and cucumber with home made mayonnaise with paprika
Courgette bake - thinly sliced courgette with bechemal sauce made with some frozen pheasant stock, topped with hamburger cheese - because that was all I had in the fridge, and some dry bread toasted and whizzed up for breadcrumbs mixed with dried parsley
Silesian sausages - a polish deli treat courtesy of my lovely mummy :)


To make mayonnaise, take a small bowl with a narrow base so that you can whisk into the bottom easily, and separate two egg yolks (discard the whites or freeze into ice cube trays for use in meringues or something).   Add a teaspoon of dried mustard powder, salt and pepper and start whisking - if you are using an electric whisk support the bowl on a teatowel because you need two hands for this.  Very very very slowly add about 250ml of oil, not oilve as that is too strong flavoured but a grape seed oil or similar, whisk each drop that you add into the egg and mustard powder emulsion, don't be tempted to rush or it won't work.  Just before the last of the oil goes in, add a teaspoon of vinegar, not malt but any pale vinegar, I use apple cider or raspberry because it adds another depth of flavour to the mayo.  Then trickle in the last of the oil, at no point stopping the whisking, and you should end up with a lovely thick yellow mayonnaise - which I should have photographed but had dumped into my tuna and crab bowls before I remembered.

And as for the raspberries - well I scoffed them with some yoghurt and cereal for my breakfast.

Sunday, June 5, 2011

Week 22 - Glass

This week's theme was glass and I was overwhelmed with inspiration - or at least I would have been if I had looked at the right week, instead of skipping ahead to next week's theme.  On the bright side, I have lots of ideas for week 23 - weather!

So today before heading off for Sunday lunch with friends, I took this:


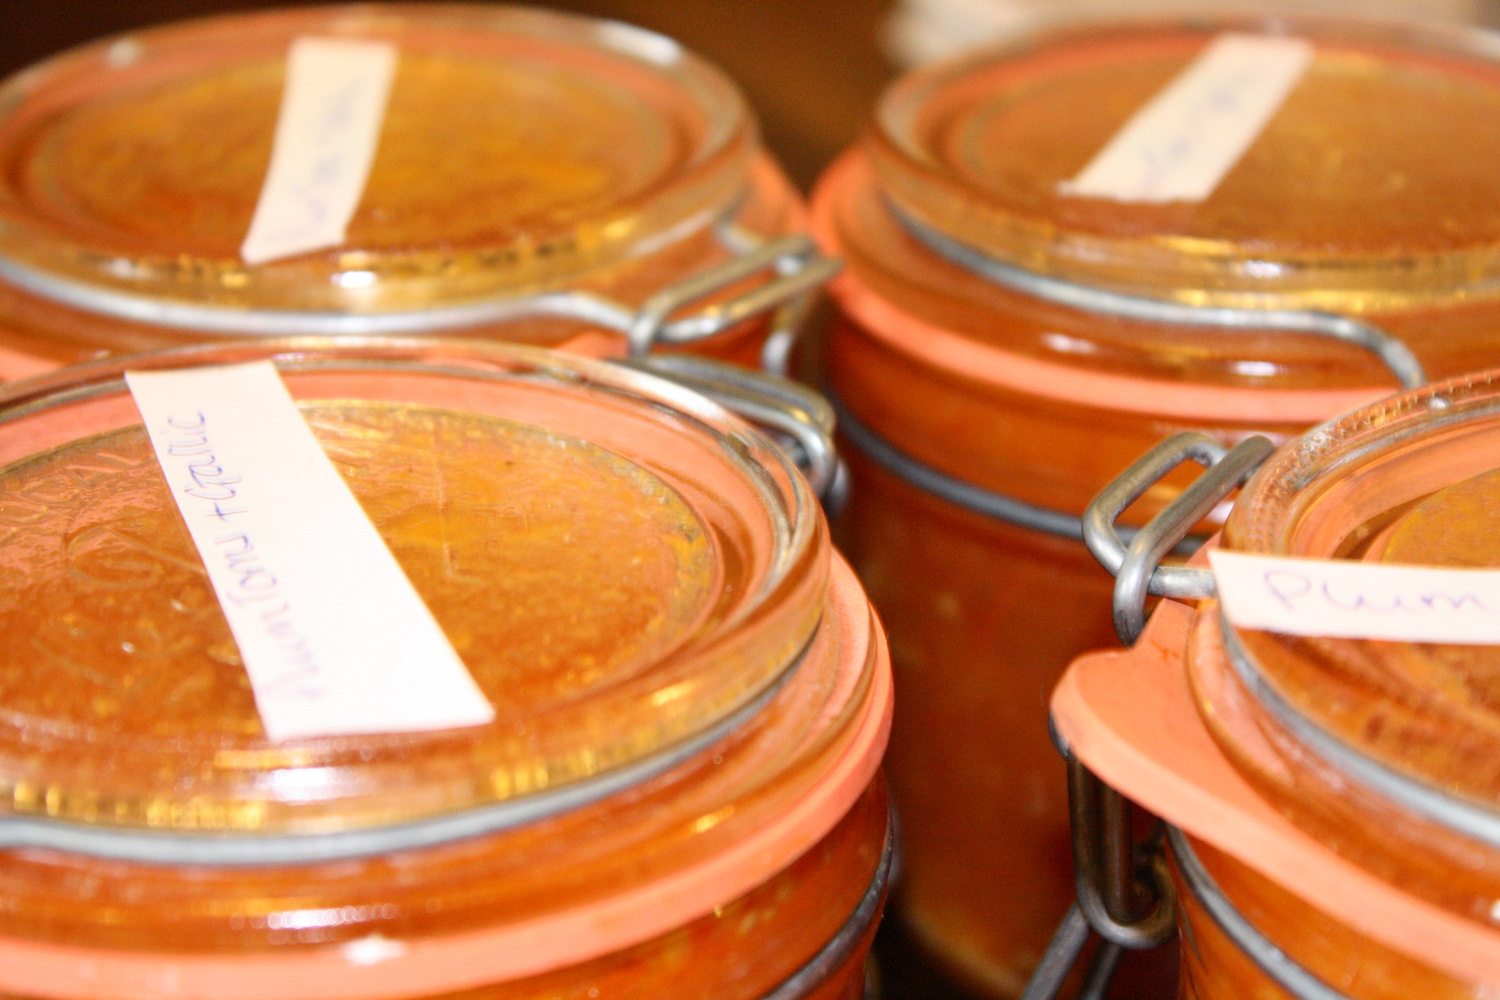
the dusty tops of a couple of kilner jars of last year's produce, tucked away in the corner of the barn.  

Every year I try to find ways of preserving as much of my veggie harvest as I can, and kilner jars are one of my favourites.
There is something about the heavy glass lids and wire catches that just evokes authentic homegrown produce.

Sunday, March 13, 2011

52 images for 2011 - Week 10 - Dreams

While gardening this week I was also musing about this week's theme of dreams, waiting (im)patiently for inspiration to strike.

When it occurred to me that the gardening I was doing was my dream, the soil at my feet contains all my dreams for the harvest to come, on my dream small holding, living the dreams of a self sufficient green life in a rural backwater.

Hence:

dreams - week 10 entry

Monday, October 4, 2010

Passata Monday

After the Sunday of plasterboard hell, and then the Sunday of plasterboard clearing up that was even more hellish, I was determined to do something nice today.

So I went to the greenhouse and picked all the red tomatoes and made jars and jars of passata for the winter.

I call it passata because it is much runnier than a sauce.

Very simple to do, just throw your tomaotes in a pan, add whatever flavours you like and a splash of water, then bring to the boil and simmer for about 30 minutes until the tomatoes are soft and cooked through but still retain some of their shape - I especially like to keep the cherry toms looking like cherry toms in the jar and on the plate afterwards.  I don't skin mine as I like the added texture and I don't boil them to a mush and make a thick paste - ditto, I prefer a bit of bite to my sauces.

I don't think that the 10 jars I made today is anywhere near enough to see us through to the next harvest but it is a start!

I am making three different flavours this time:

A red tomato and fresh oregano passata

A plum tomato and roasted garlic passata

A cherry tomato and fresh basil passata


The whole house smells lovely, full of garlic-y, basil-y and tomato-y flavours.

Monday, September 27, 2010

The last green tomato recipe I promise

Green Tomato and Ham Soup

Fry in a little butter:

200g ham or 150g bacon
1 small onion diced
2 cloves of garlic

When the onion is golden and soft add:

1 litre of chicken stock
8 medium green tomatoes
2 medium red tomatoes
1 green bell pepper
salt and pepper to season

Boil it all together for at least 30 minutes, then using a stick blender whizz it up to create a thick green gloopy soup. To finish and just before serving, stir in a dash of tabasco sauce.


It is turning cold here, another ground frost last night, and just a few cabbages left in the garden now, oh and some potatoes to dig up, and some more beetroot - er I think that's it now.

It is heading fast and furiously into fire lighting in the studio and handing out in there time. Hurrah. With the recent amount of time spent gardening and dealing with the harvests I have not had much chance to get any sewing done so looking forward to getting stuck in to some of my outstanding projects.


Yesterday was a lazy day, the puppy went home leaving behind some bereft kittens and a moping Border Collie, we played a game of Monopoly (which Thea won AGAIN) and then a bit of knitting in front of the TV, once again trying to finish off some projects neglected over the summer when you don't much feel like knitting winter woolie hats!

Now it is Monday morning, I have spent it so far dealing with outstanding emails and correspondence from the weekend, a quick stroll with the dog in a minute and then when I get back from work I am shutting myself away with my fire in the studio.
Posted by Picasa

Friday, September 24, 2010

Harvest time

Today is a deluge, but yesterday was glorious with a capital 'G'.


So we got to digging - first some carrots...


.... then some beetroots....
..then some onions...


....then some potatoes.....


...then some kohl rabit (bored of digging now so hunting for above ground harvests)...

... found some more beans drying out nicely, and the last few patty pan squashes....


...and for the grand finale - the grape harvest!


Posted by Picasa

Sunday, September 12, 2010

Getting plastered and drying beans

No that's not a reference to our intake over the weekend but the fact that Thea's bedroom ceiling is getting insulated and plastered ready for the winter.

Brendan is doing the standing on the ladder with the fiddly trowel part and I am doing the wipe the bits of wet plaster off everything and clean up all the plaster dust, wash everything down and try to tidy it up part.

A fair division of labour.

That just leaves the hall above the stairs to be plastered now.

Inbetween times I managed to get some lovely macro shots done on Saturday so some time to upload and sort those out needs to be found this week.


Today, just before the weather broke for a storm I managed to get half of my borlotti bean harvest in.

I grow french stringless beans every year until they get too numerous to pick and then I leave them on the plants to form haricot beans that I can dry and use over winter, but I also grow a specific crop of borlottis.

I much prefer these to any others, they are a fantastically hardy plant that has a prolific harvest and seems happy in any old soil.

Plus they look really pretty too.

I find that the best way to conserve them for the winter is to store them as dried beans, and the best method as far as I am concerned is to let them dry out on the plant itself.

Just pull the plant up when it has died back and all the pods are dry and you can hear the beans rattling around inside.

Pick them, spread them out in the sun for a couple of hours after picking then store in an air tight kilner jar or similar.

I wash the jars thoroughly then to make sure they are bone dry and bacteria free I stick them in the oven to dry for 20 minutes (alongside a cauliflower cheese dish this time), then put the lids on loosely and leave to cool.  Don't try to put the beans into a hot jar they will sizzle and smoke and burn.

To make sure that your beans will stay nice and healthy all through the winter, first leave them outside on a tray to dry in the sun for a couple of hours as mentioned above - this drys and hardens the skins and lets all the little bugs that may have been in the pod or on the plant get far away.  Then ensure you only try to dry and keep healthy beans, any that have discolouration or feel squishy or damp should not be kept in a jar over winter - they will pollute all the other beans and ruin your harvest.

Here is my little helper - making sure any beans that I reject get a good scoffing and don't go to waste.

Just behind her you can see the first lot of pumpkins almost ready for picking.

Right back to cleaning Thea's florr before she gets home and realises what a huge mess we have made in  her bedroom.

Posted by Picasa

Friday, September 10, 2010

Friday night take out - Roast Pumpkin Thai Soup

Only we don't have one so this is as good as, i.e. it is quick and easy to make, uses stuff from the larder so is economic and frugal too.

Back in June during the horrid wet weather I made up a jar of Thai green curry seasoning (here).

In the spirit of waste not want not, having roasted some patty pan squashes the other day and not really having any clear plan of what to do with them, I made a huge pan soup.

Roast Squash Thai Soup


1 large squash or pumpkin
2 teaspoons of Thai green curry paste as per the recipe referenced above
1 litre of chicken stock
1 teaspoon salt
200ml of thick cream or coconut milk

Roast the pumpkin.  I know this seems a bit daft, to cook something twice but there is a big taste difference.  To be honest it is just as economic to roast for 45 minutes as it is to cook the pumpkin in the soup for 45 minutes.

Cut the pumpkin into large cubes once deseeded and the skin removed.  I used patty pans so no need to do either but then I am still overrun with them so they are going into every meal at the moment.  Spread the cubes over a large roasting tin, season, add a drizzle of olive oil and roast for about 45 minutes until the squash is soft and squidgy.

Bring a litre of stock to the boil, add the Thai seasoning, the salt and the pumpkin and simmer for a couple of minutes, then add the cream; or if you have it coconut milk, the added sweetness of the coconut milk is good but don't stress too much about a lack of exact ingredients.

The idea of a good warming comfort eating soup is that it should derive from the ingredients you have to hand or the harvest from your garden.  A soup you shop for is not the same.  (my opinion)

Where was I - you've roasted the squashes, simmered the stock, added the salt, the Thai seasoning and stirred in the cream - oh yes - time to eat!

Tuesday, August 31, 2010

Surfeit... (updated to include recipe idea)


...of patty pan squashes - time to search for more recipes methinks.


Patty pan squashes are taking over my life.  Today we had pan fried squash, peeled because they are quite large now so the skins are much thicker, then sliced thinly, fried in some garlic infused olive oil with some of the greenhouse ready cherry tomatoes.  Once fried, I added a litre of chicken stock and left them to cook for 30 minutes until tender.


Served tonight with some garden carrots - how do they manage to taste so carroty compared to supermarket carrots?

Alongside some stuffed turkey breasts.  These I actually found reduced at the end of the day yesterday in the local supermarket so grabbed them quick because you don't get many reduced bargains in France.  I bashed them flat with a rolling pin (cover the meat in saran wrap/cling film before bashing as it stops bits of meat flying off and sticking to the walls).  Once flattened I chopped some fresh basil leaves, added ground black pepper and mixed it with some soft cheese - I used sheep's milk cheese for no other reason than I found it on offer at our local farmers' market the other day and decided to try it.  Then spread the cheesey paste on the meat and roll up before putting in a shallow oven proof dish and cooking for 45 minutes at 200°C.


Saturday, August 14, 2010

Harvest day and holiday musing.

The storms that we have been forecast for the last couple of days have not arrived and the garden is parched, but somehow manages to keep providing us with gluts.

Today is a glut of second cut calabrese, the first cut of the main heads was a couple of weeks ago and now all the resprouting has provided us with another bag full, and in addition 6 of the cauliflowers needed cutting. We also gathered in another large colander of french beans, several more courgettes, and 4 patty pans squashes.

I am trying to get as much of the ready to freeze stuff in as I know that whilst I am away my dear other half will forget that the garden even exists and I don't want to lose too much.

Speaking of going away there are only a couple of days left till we fly into the UK. To say I am underwhelmed by the prospect is an understatement. I don't think I could be less enthusiastic if I put any effort in. I am looking forward to seeing my mum, it has been 10 months since we actually saw each other and I know she has missed Thea, and there are a couple of fun events to go to while I am in the UK, but nonetheless I shall hate leaving my house and my stuff behind, the garden needs a lot of attention at the moment and there is so much to harvest, as well as the rabbits on deathrow to sort out, and of course my studio.  I should perhaps point out that it has been 4 years since Thea or I have been in the UK, neither of us has been back for a visit since we moved out to France in 2006.

I am also determined not to fail in my project mission just because I happen to be in the UK, but without my sewing stuff and the general clutter of my life around me I am not really sure what to do. I will also be without internet access unless I find an internet cafe to use so my posts are unlikely to be daily either. The trip to the UK was not planned until my 2010/365 project had already started.

I have been thinking of keeping a daily journal while I am in the UK. Not just because I will inevitably find some projects to complete but as a project in itself. I love the act of physically putting pen to paper but these days correspond mostly via a keyboard. It would be interesting to see what illegible scrawl my once lovely penmanship has degenerated into (years of bashing with a ruler if we did not write neatly in school has been an indoctrination hard to shed but I feel that I have finally succumbed to the slobbishness of querty..)

My trusty Canon is taking the trip with me so I am setting myself a photography challenge too. The random word challenge. Each day I will pick a word at random from a random book and photograph something to illustrate the word.

Hard to find any gardening projects to do when my mum's is mostly slabs, but I know she hates cooking so I think there is scope for recipe blog entries. I am tentatively looking forward to going to a UK supermarket and finding everything under one roof having gotten used to travelling an hour in order to buy chillies here in France because nowhere local sells anything more exotic than a red cabbage.


Oh well - que sera - as they say.

In a last ditch effort to try not to lose the runt of the chicks to a passing buzzard we have been reinforcing the grill fencing to try to prevent him squeezing himself out and roaming around the garden.

A proper bit of improvisation this, some blue baling twine (recycled of course) and some dry twigs from when I cut back the trees earlier in the year combined with a bit of nifty weaving should hopefully stop him from being someone else's dinner.
Posted by Picasa

Thursday, August 12, 2010

I am a domestic goddes I am - no really I am. I AM!


I made a cake to prove it too!

Not that anyone actually wants to eat it (altogether now "ahhhhhhhhhhhh").

Why don't they want to eat it I hear you proclaim, it looks all lovely and risen and moist and yummy and scrummy and all things nice?

Well I'll tell you why no-one wants to eat it (the ungrateful so and so's), it's because it is a courgette cake.

Yes that's right - the scourge of the glut harvest, courgettes rear their ugly heads again.  The courgette bread my family could cope with but they seem to feel that cake is taking it one step beyond.


In fact Brendan went to extremes to declare that courgette cake was just 'wrong' 'wrong' 'wrong' and thrice 'wrong'.

But just in case you feel differently, here's the recipe anyway.

Chocolate and Courgette Cake

350g self raising flour
175g melted cooking chocolate
1 teaspoon mixed spice or cinnamon if you don't have mixed spice
175ml olive oil
3 eggs
2 teaspoons vanilla extract
150g chopped mixed nuts

Melt the chocolate in a pan, grate the courgettes and whisk the eggs and oil together  - obviously if you are a domestic goddess like me you can do all three simultaneously.

Combine all the ingredients together in a bowl with a spatula - no need for electric gadgetry for this if you are a domestic goddess like me.

Grease a springform cake tin or a large loaf tin, pour in the mixture and cook at 180°c for about 40 to 50 minutes - if you are a domestic goddess like me you will know automatically when the cake is ready to take out of the oven, if you are not a domestic goddess like me, stick a metal skewer in it and if it comes out clean the cake is ready.


Friday, July 16, 2010

Seven Courgettes

Harvested my first seven courgettes from the garden today.

So tonight we will be eating....

Courgette and Bacon Frittata


I usually use 1 medium sized courgette per person, and 1 slice of bacon per person and adjust the eggs  accordingly.


Heat some veg oil in a non-stick frying pan, fry courgettes, bacon and a large onion chopped finely, for a few minutes until the onion is soft and golden.


For the frittata mix:

2 tbspn fresh thyme
1 tbspn fresh rosemary
2 eggs
salt and pepper

Whisk together, then pour over the courgettes, bacon and onion in the pan, season a little more if required - depends on the saltiness of your bacon usually.

Cook over a low heat for about 4 minutes, or until set, then grill for a couple of minutes to brown the top, garnish with a few fresh leaves of thyme.

The frittata will be accompanied tonight with some freshly dug salad potatoes, boiled in their skins, then once cooled, a couple of tablespoons of mayonnaise stirred through them, seasoned and a liberal sprinkling of freshly chopped dill fronds.

Off to watch the fireworks later for our local town's summer festival, bands in the street, a fair with rides, tables and chairs in the road outside the cafe, free fireworks set to music.  Lovely.


Posted by Picasa

Wednesday, June 30, 2010

Garden Pea Risotto recipe

I'm on a roll now.  With things finally ready to eat from the garden, I am continuing my domestic goddess impersonation with another fresh from the garden recipe today.


Garden Pea Risotto

2 tablespoons olive oil
risotto rice (1 cupped handful per person)
1 crushed garlic clove
1 finely chopped onion
fresh peas (or frozen) - same volume of peas as rice
1 small glass / 150 ml white wine
2 litres of veg or chicken stock - you may require less depending on how many people / how much rice you are using


For the best flavour, if you can; start the risotto cooking then nip out to pick your peas for the ulitmate in fresh food, if not, pick peas then leave in a bowl in the freezer, start the risotto then use the peas when required by the recipe, but don't leave them in there longer than half an hour.

Fry a finely chopped onion and a crushed garlic clove in 2 tablespoons of olive oil.

To the oil add a cupped handful of risotto rice per person.  For risotto you do need risotto rice, otherwise you don't get that creamy texture.  If you use normal rice you get a very good rice side dish though, so it is a win win situation!

Fry the rice gently until it is transparent, then add a small glass of white wine and let boil for a couple of minutes to eradicate the alcohol.

Turn down the heat, and start ladling in the stock, a spoonful at a time; as each spoonful is absorbed add another.  You may not need all the stock depending on how much rice you are using, for 2 people a litre should be enough for the 2 cups of rice, and 1.5 litres for three people, and 2 litres for 4 people and 4 cups of rice.

When the rice has been cooking for about 15 minutes, add the peas, and cook for a further 5 minutes.

The risotto rice should be creamy and soft on the outside but a little firm on the inside, and there should be enough liquid to coat each grain and leave a smear on the plate without the rice swimming in stock and needing a bowl to hold it all together.

At this point you can stir in some butter for extra creaminess, or some grated cheese.  I like mine as is with a couple of sprigs of mint on top.

Tuesday, June 29, 2010

Redcurrant Jelly - tutorial

With various voices demanding what I am harvesting at the moment it has been so repetitive to reply with the constant refrain of nothing - it's been too wet then too dry then too wet - but finally there they were, luscious little red berries peeking through the foliage - the first redcurrants of the year.

Now I am not known for my jam making, I make very little of it because we generally eat very little of it. In fact show me a ripe fruit and my first reaction is to throw it into some alcohol and make a liqueur not to smear it on some bread during the winter months.

But I was feeling all domestic goddessy today so with a colander full of redcurrants I decided that jelly not jam was the way.

Before you ask I don't know the proper differentiation between jam and jelly but to my mind it goes like this - jam has bits in, and jelly is strained to create a clear liquid.  I make grape jelly, quince jelly and raspberry jam, and then there are compotes which are just stewed fruit and not set like a jam or a jelly is.

Redcurrant Jelly tutorial 

First catch your redcurrants.
The easiest way I have found to strip the fruit from the bushes is to use a fork, just run the tines along the fruit clusters and the ripe red berries will pop off into your bowl.
As you may have noticed from many of my recipes I am not a great fan of measurements, but unfortunately for jam/jelly you do need to do some measuring.  So I have simplified everything into cup measurements.  I have no idea how large a 'cup' is supposed to be in terms of conversion tables for American recipes, but for this as long as you use the same cup throughout you will be fine.

I use the plastic water beaker from my bread machine as my basic cup size.
Boil your redcurrants in water to the following ratio - 2:1 - 2 cups of fruit to 1 cup of water.  Boil until they are dissolving - about 15 minutes.

Then strain either through a very fine mesh sieve, or through a jam sieve.  Leave to drain for about an hour, then put a weight in and leave for another hour.

 I just used a can of tomatoes wrapped in some cling film as my weight, straight on top of the fruit in the jam sieve.
 If you have the time, you can add some additional weights and let the juice continue to drain for longer.

Once you have your liquid, measure the volume - again I do this in cups, and pour back into the saucepan. Then add a cup of sugar per cup of fruit juice, and bring to the boil, stirring continuously.

Once at a rolling boil, stop stirring and let the liquid cook for 5 to 8 minutes, skim off any scum that may form on top.  The jelly should reach setting point at about 104°C - but I don't have a jam thermometer so do the saucer test instead - take a teaspoon of the jam mixture, put on a cool saucer and leave for 60 seconds by which time it should start to form a skin.  If not let the mixture cook for another minute.

You will need to have some sterilised jars ready - the easiest way to do this is to pour some boiling water into a clean dry jar, put the lid on, shake well and leave to cool for a couple of minutes, pour away the water and immediately pour in your mixture.  You can also sterilise jars in the oven, and also once filled you can boil them in a water bath.

Pour your jelly mixture into your jars and turn upside down for a few minutes to create a good seal, then pop the right way round and leave to set.

Once opened they will keep in the fridge for a while, or store in a cool dark place until Christmas for Goose with Redcurrant jelly.

If for some reason your jam or jelly does not set - open the jar back up, reboil with some more sugar, preferably preserving sugar which has added pectin and pour into a clean sterile jar to set.


Oh I do feel all domestic goddess like now!